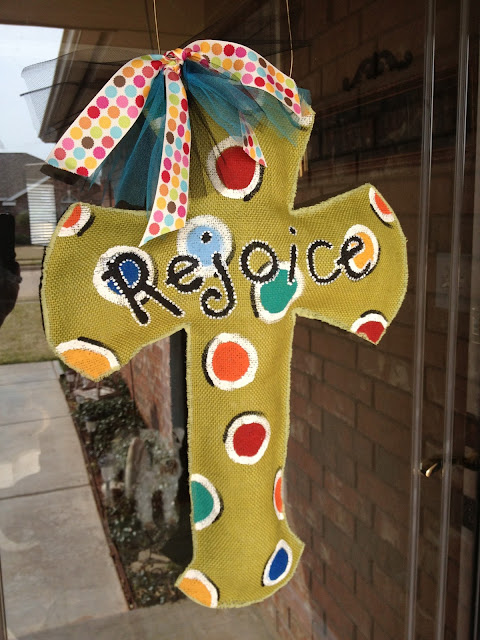
Start with burlap in your choice of colors.....there are so many to choice from for only $3.99 a yard at Hobby Lobby or your area fabric store.
Make a template of the shape you desire....in this case, a cross.
Then place the fabric's top shape on paper to paint. Put the backside fabric aside. Because burlap is very porous, the paint will seep through so be sure to do it on a covered surface.
I used a variety of brush sizes to do each color. I free handed mine, but you can made a template and draw around it with a sharpie or pen and then paint it if you like.
Again I add "Rejoice" but you can do what you like. I used a small, pencil tip brush to write it out first, then came back with a thicker brush to make the letters. Again make a template if you are not comfortable doing it free hand.
Then go back around the letters with white dots of paint to make it stand out better.
NOW after all that is dry....it's time for the assembly of your cross. Have some Walmart bags for stuffing and a small hot glue gun (or you can sew it as well). The sides will be fray a bit, but I will show you what to do at the end to stop that from happening.
When glue gun is hot, put cross back to back and go around with the hot glue gun leaving a side or bottom open to stuff with bags.
After it is completely stuffed to your satisfaction, glue the rest together.
Now let's address the fraying....you can use Fray Check at the fabric store if you like, but it is real messy and doesn't soak in well to burlap. So I use paint, in this case, the closest to the burlap color. You can can do a design or a different color. I've seen it done many ways. But I didn't want a design on mine and wanted it to blend in as much as possible. SO I painted the edges with a fairly wide brush all the way around the sides. After it dried, I took my sissors and trimmed the extra strings. By this time, the paint has made the sides hard and the strings hard and you can just do some cleaning up.
Then for hanging, I use a wire hanger...why buy wire. You can use ribbon, or floral wire. I choose to use what I already have from our weekly dry cleaners...wire hangers that I would normally throw away. Needle nose pliers help to bend as you need and wire cutters to cut to the length you want. Just puncture through the burlap where you want to add the wire and twist with pliers to the desired look and length.
And now the finished product! Add cute ribbon or even different colors of burlap strips and put on your door! People will think you bought it when you can tell them you made it!
ENJOY! My next door hanger will be a birthday theme since I have two birthdays coming up in the family! Keep checking for recipes for my March/April monthly menu and this next week, I will be posting my Easter lunch that I am serving so please subscribe to my blog!
Psalm 40:16
But may all who seek you REJOICE and be glad in you; may those who love your salvation always say, "The LORD be exalted!"
But may all who seek you REJOICE and be glad in you; may those who love your salvation always say, "The LORD be exalted!"
.JPG)
.JPG)
.JPG)


.JPG)


No comments:
Post a Comment